
Not sure how to install WordPress without cPanel? No problem — we’ll help you do it step by step.
WordPress stands out as a leading site-building tool worldwide, praised for its practical design, adaptability, and extensive theme and plugin library. It powers not a few hundred but millions of websites, whether personal blogs or large business portals.
A lot of hosting providers give one-click WordPress installations through cPanel, but not everyone. Specifically, cloud servers or VPS environments in general don’t feature cPanel, as users prefer more control and want to avoid cost.
If you are also in a similar scenario, it is better to install WordPress either manually or through a modern server management tool. Here comes FlexiCloud Panel, a lightweight and user-friendly control panel. It is meant for managing cloud servers without the complexity of cPanel. It automates important tasks like DNS setup, SSL configuration, server optimization, and WordPress installation.
Let us walk you through how to install WordPress using FlexiCloud Panel instead of cPanel. We will cover everything from WordPress setup configuration, server setup, to performance optimization and more. Ultimately, you will have your website running without dependency on cPanel.
Why Choose FlexiCloud Panel Over cPanel?
cPanel is a popular control panel, but it isn’t left alone without limitations. In fact, a lot of users complain about it being complex, while the licensing cost remains very high. But on the other hand, FlexiCloud Panel is a simpler and cost-effective option for managing all cloud hosting requirements. It isn’t very complex and is suitable for both beginners and advanced users.
Here’s a quick check on the reasons you should choose FlexiCloud Panel over cPanel:
- User-friendly dashboard that lets you manage websites and servers without getting involved in technical complexities.
- It isn’t as expensive as licensing cPanel, and there’s no hidden fee.
- For fast deployment, it supports all cloud providers.
- It comes with several built-in features like database management, SSL setup, server monitoring, etc.
- It is lightweight, fast, and optimised for performance.
For new customers looking for a better hosting experience, FlexiCloud Panel gives full control with less fuss. It’s a great alternative to traditional cPanel hosting.
WordPress Installation Process – Prerequisites and More
To begin the WordPress installation process on FlexiCloud, ensure a few essentials are ready:
- Active FlexiCloud hosting account
- A registered domain name pointed to the server
- Access credentials for FlexiCloud Panel
- Basic understanding of WordPress, including installation and settings.
If you already know the server capacity you require, simply pick the right server plan. During the installation process, you only need to fill in the required fields on the setup form.
If you face any issues or have questions, FlexiCloud’s technical support team is ready to assist you promptly.
Having these basics ready upfront makes your WordPress installation smooth and fast, letting you focus more on building your site than on setup troubles.
Note: If you anticipate any difficulties with this WordPress installation without cPanel, please contact the FlexiCloud team in advance for technical support.
Step-by-Step WordPress Installation on Hetzner and Vultr via FlexiCloud Panel
Looking to host your WordPress site effortlessly on fast cloud servers? FlexiCloud provides a smooth way to do this. We’ll take you step-by-step on setting up your server with Hetzner or Vultr and installing WordPress via the FlexiCloud control panel, no command line skills required.
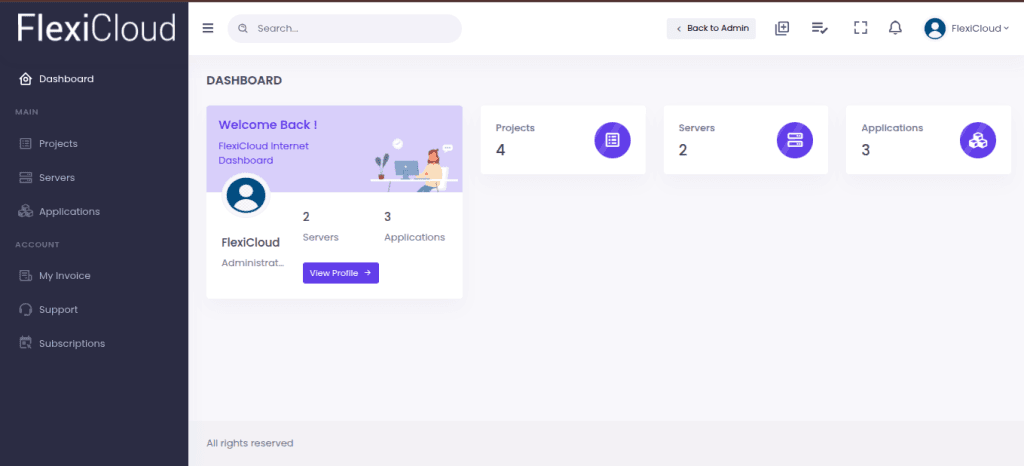
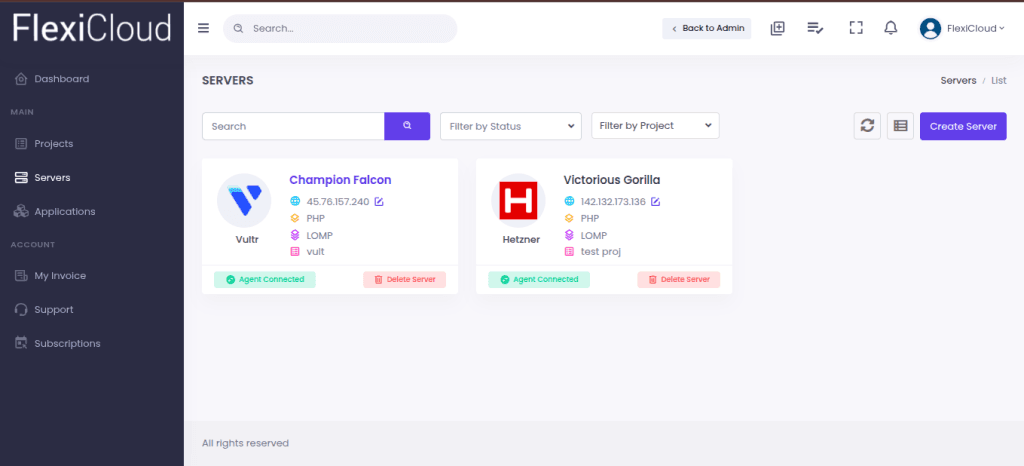
- In the FlexiCloud dashboard, go to Servers (on the left pane menu). Here, you can provision and manage servers on Hetzner and Vultr simultaneously.
- You can click on the Create Server tab.

Now select a server and make sure it matches the performance needs, budget and hosting location of your website. Check the images below for reference.
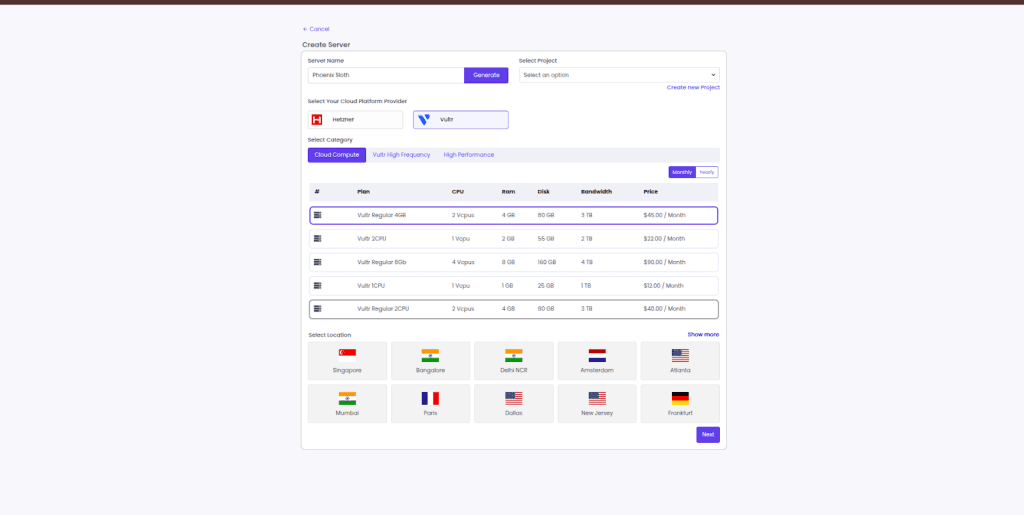
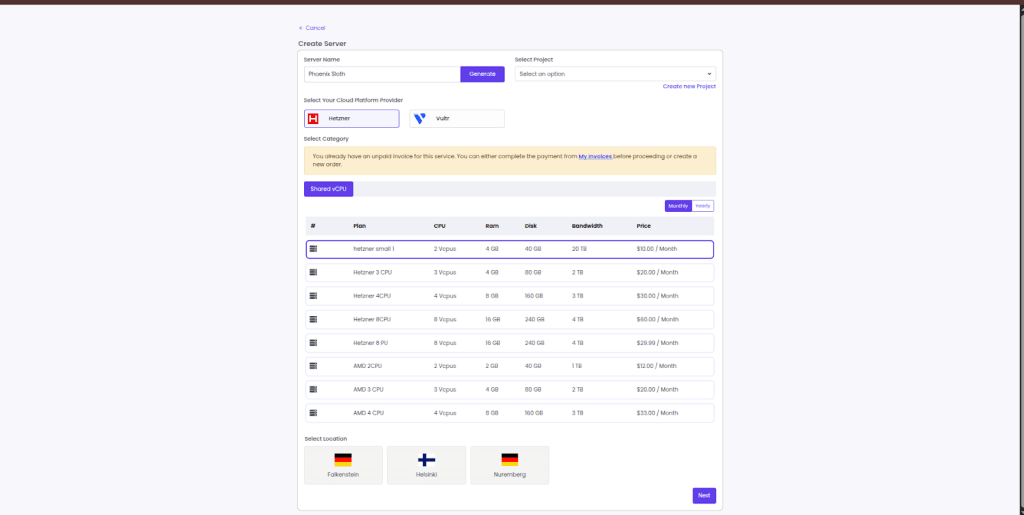
Once you’ve made your selection, click on Next to proceed to the next step of installing WordPress.
Step-by-Step WordPress Installation Process Using FlexiCloud Panel
If you are ready for WordPress setup configuration without cPanel and with FlexiCloud Panel, this guide will help you:
Step 1: Set up Your FlexiCloud Hosting Account
Your WordPress installation process begins with creating and setting up a FlexiCloud hosting account. Purchase and activate your server, then open an account and log in to your FlexiCloud Panel dashboard. This initial step will prepare you for WordPress installation. You can create your FlexiCloud account here: https://dashboard.flexicloud.in/register.
Step 2: Install WordPress
Once you are on the FlexiCloud Control Panel dashboard, select the Servers option from the left-side menu list. You will find the list of purchased servers and choose the right server.
Go to the Applications from the left side of the screen and click on the Create New button.

Now, enter your application name (for instance, FlexiCloud) and select Application type as WordPress, and click on Next.

Now, on the ‘Deploy a Web Application’ screen, enter your domain name and follow these steps:
- Select the application username -> Set the website title -> Choose the PHP and WordPress versions, as you can see in the screen below.
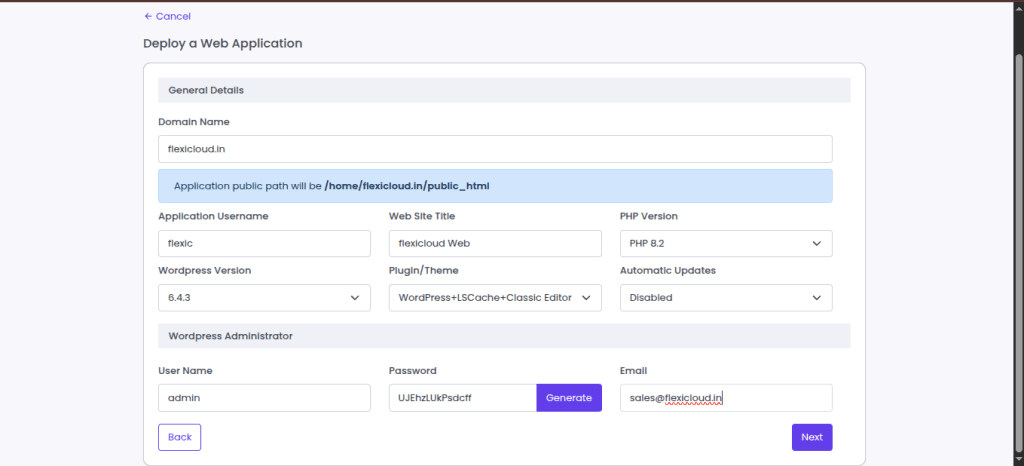
- Once done, configure other settings and click on Next.
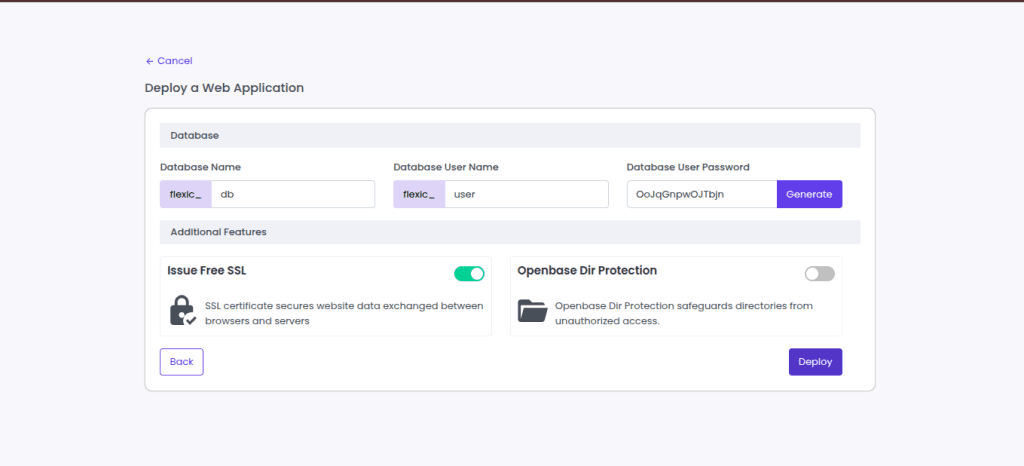
- After that, enter Database Name and Database User Name. At this step, you can toggle on the button for ‘Issue Free SSL’. Click on Deploy.
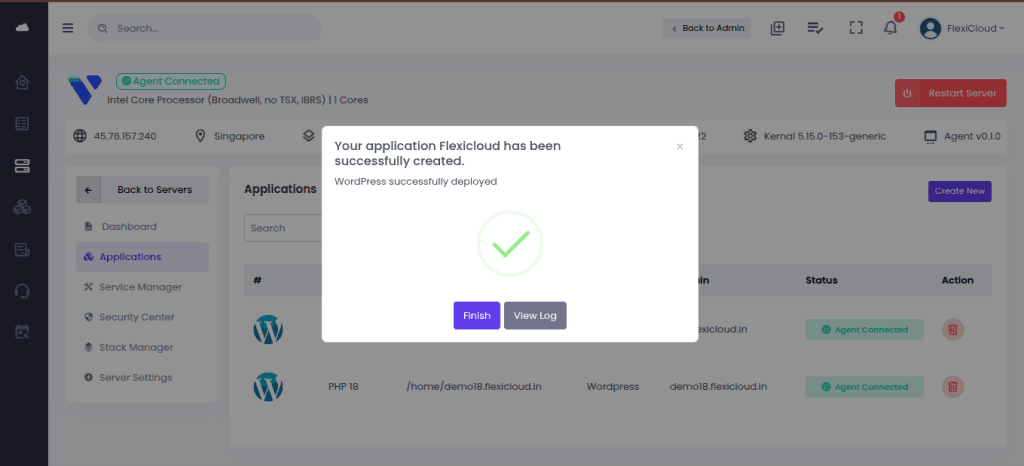
- Now you can see the “Your application FlexiCloud has been successfully created” message on the screen and WordPress is deployed. Simply click on Finish, and you are done.
- Users can now create an app under the Applications section.
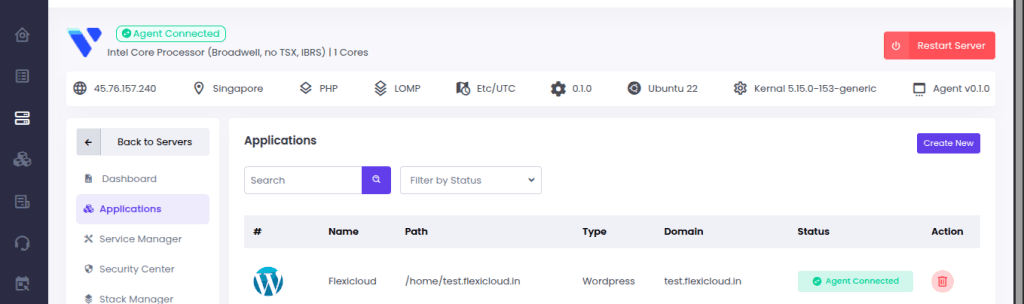
Now, you can browse your domain after pointing it to the server IP you purchased earlier.
FAQs
How to install WordPress manually without cPanel?
The WordPress installation process ‘manually’ is smooth and quick. To do that, download WordPress -> upload it to your server via FTP, -> make a MySQL database. Now, complete the installation process via your website URL.
Is it safe to install WordPress without cPanel?
Yes, installing WordPress without cPanel is completely safe. However, it is important to make sure you do it correctly with a secure database setup, proper file permissions, and updated WordPress versions.
What is the WordPress installation process in FlexiCloud Panel?
The WordPress installation process in FlexiCloud is simplified. You can do that through an intuitive dashboard, automating key steps like domain setup, database creation, and server optimisation.
Do I need technical skills to follow this tutorial?
The above tutorial is easy to follow, even with minimal technical knowledge. The guide is easy enough with clear instructions for beginners – just basic hosting and WordPress introduction.
Can I use this method for multiple WordPress sites?
Yes, this method will let you install and configure multiple WordPress sites efficiently. You can even install each site independently with flexible WordPress setup configurations.
Conclusion
Overall, installing WordPress without cPanel while using FlexiCloud Panel is quick and efficient. You start by setting up your FlexiCloud hosting account, later automating the key steps, optimising the server, and more. This process is easier than traditional manual setups.
In comparison to cPanel, FlexiCloud Panel is a lighter, modern, and cost-effective alternative. It is suitable for cloud environments and users seeking extra control but less complexity.
